Table of Contents
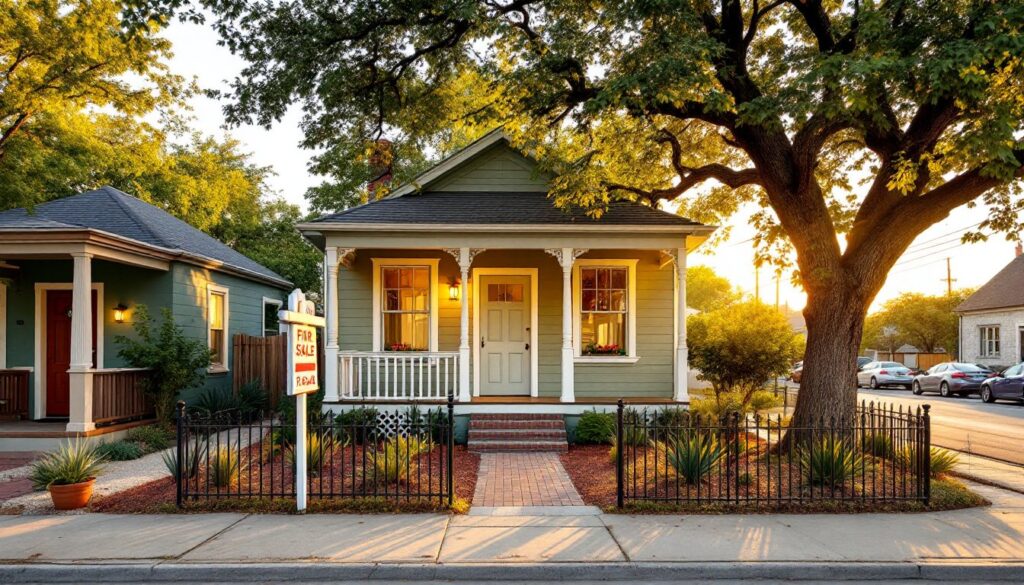
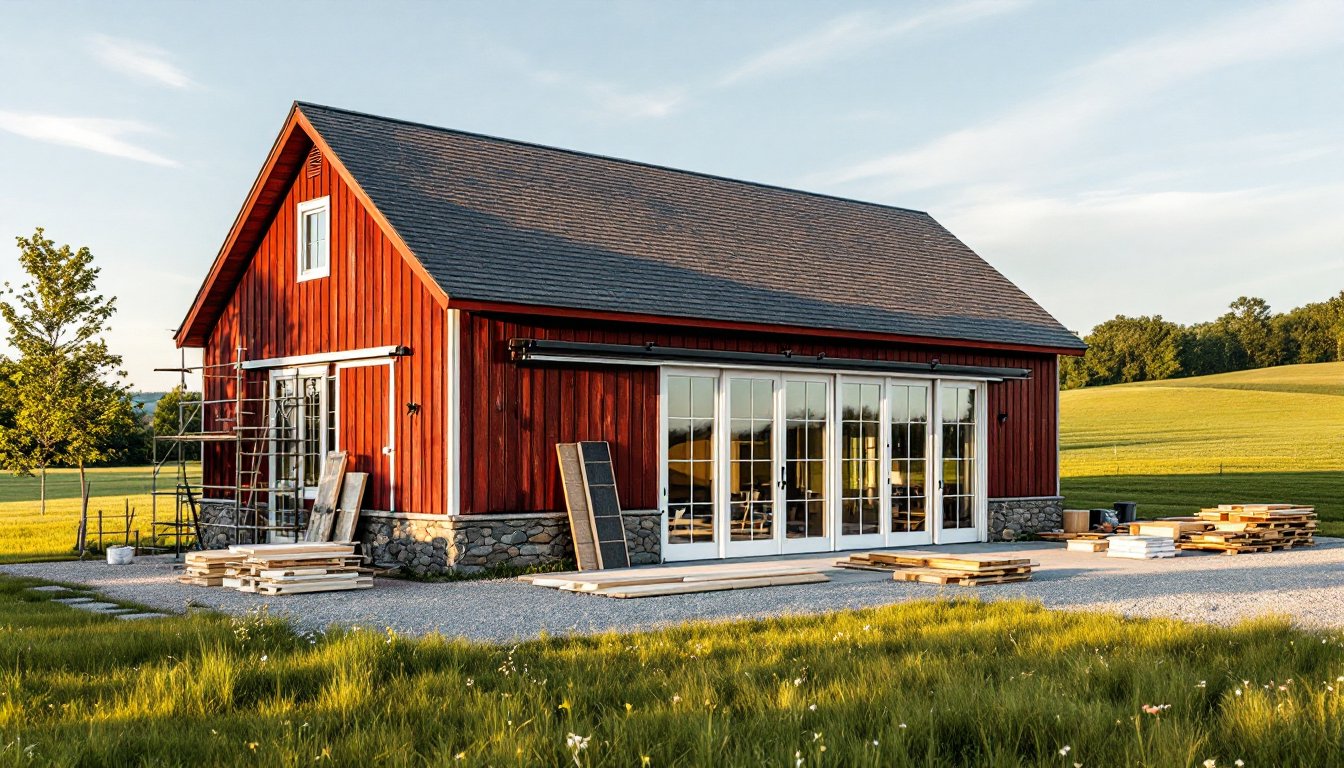
ToggleConverting a small barn into a home isn’t just a trend, it’s a practical way to preserve existing structures while creating a one-of-a-kind living space. These conversions blend exposed beams, high ceilings, and wide-open floor plans with modern amenities, offering a lifestyle that’s equal parts rustic and refined. Whether working with a weathered tobacco barn or a compact stable, homeowners can transform agricultural structures into energy-efficient, code-compliant residences. The process demands careful planning, realistic budgeting, and a solid understanding of structural and mechanical systems, but the payoff is a home with character that can’t be replicated in new construction.
Key Takeaways
- Converting a small barn into a home preserves existing structures while creating unique living spaces that blend rustic charm with modern amenities at a cost of $100 to $200 per square foot.
- A licensed structural engineer assessment is essential before barn conversion, as agricultural structures must be reinforced to meet residential building codes and live load requirements.
- Barn conversions require change-of-use permits and must comply with the International Residential Code (IRC), including egress windows, proper insulation (R-38 for ceilings), and upgraded electrical and septic systems.
- Expose original beams and trusses as focal points, use open floor plans for great rooms, and incorporate large windows to maximize natural light and showcase the barn’s architectural character.
- Set aside a 15–20% contingency budget for unexpected costs like foundation repairs, pest damage, and hidden rot, which commonly inflate small barn conversion projects.
- Achieve energy efficiency through air sealing, spray foam or batt insulation, triple-pane windows, and mini-split heat pumps to maintain comfortable temperatures in large, open barn spaces.
Why Convert a Small Barn Into a Home?
Barn conversions offer cost advantages over ground-up construction when the shell is structurally sound. The framing, roof trusses, and foundation, often the most expensive components of a build, are already in place. Many older barns feature dimensional lumber that’s no longer readily available, including true 2×8 or 2×10 joists milled from old-growth timber.
The aesthetic appeal is undeniable. Exposed post-and-beam framing, original siding, and soaring ceilings create architectural interest that’s hard to achieve in conventional homes. Open floor plans come naturally, as barns were designed for function over compartmentalization. This flexibility allows homeowners to configure living, dining, and kitchen spaces without load-bearing walls dictating layout.
Sustainability is another draw. Adaptive reuse reduces construction waste and preserves historic structures that might otherwise be demolished. For rural properties, converting an existing barn maintains the site’s agricultural character while adding livable square footage. Zoning boards in agricultural districts often favor conversions over new builds, as they align with rural preservation goals.
Planning Your Barn Conversion: Essential Steps Before You Begin
Start with a structural assessment by a licensed engineer. Barns weren’t designed for the live loads, insulation, or utility runs required in residential spaces. The engineer will evaluate foundation integrity, roof framing capacity, and lateral bracing. Expect to add steel beams or sistered joists if the existing structure can’t support residential floor loads (typically 40 pounds per square foot for living areas).
Measure and document everything. Barns often have irregular dimensions, out-of-plumb walls, and sagging rooflines. These quirks affect material orders, window installations, and mechanical layouts. Photograph existing conditions extensively, this documentation helps when applying for permits or making design decisions later.
Hire an architect or designer familiar with barn conversions. They’ll help preserve original features while integrating modern systems. Decide early which elements to keep (exposed beams, sliding barn doors, original siding) and which to replace. Rotted sills, compromised roofing, and unstable foundations can’t be saved and will need rebuilding to code.
Zoning Laws and Building Permits
Barn conversions typically require a change-of-use permit and must meet the International Residential Code (IRC). Agricultural structures aren’t held to the same standards as dwellings, so bringing a barn up to residential code involves significant work. Expect requirements for egress windows, smoke detectors, GFCI outlets, insulation with minimum R-values (R-38 for ceilings, R-13 to R-21 for walls in most climate zones), and proper fire separation if the barn is attached to other structures.
Zoning regulations vary widely. Some jurisdictions allow residential conversions in agricultural zones as-of-right, while others require conditional use permits or variances. Setback requirements, minimum lot sizes, and septic system regulations all come into play. If the barn is historically designated, expect additional review by a historic preservation board, which may restrict exterior changes.
Septic and well systems often need upgrades. A barn used for storage doesn’t require a drain field sized for a three-bedroom home. Budget for percolation tests, septic design, and installation if municipal sewer isn’t available. The same goes for electrical service, most barns have minimal power, while a modern home requires a 200-amp panel minimum.
Design Ideas for Barn-to-Home Transformations
Great room layouts work naturally in barns. Leave the main level open with a central living area, kitchen island, and dining space. Use area rugs and furniture arrangement to define zones rather than walls. If ceiling height allows, add a loft bedroom or office accessed by an open staircase. This preserves vertical space and showcases the barn’s volume.
Exposed beams and trusses are prime focal points. Clean them with a wire brush, treat for insects, and finish with clear sealer or matte varnish. If original siding is salvageable, use it as interior accent walls. Pair reclaimed wood with modern elements, steel railings, industrial lighting, polished concrete floors, to balance rustic and contemporary.
Oversized windows and glazed doors maximize natural light. Barns often have small window openings, so cutting in new rough openings for picture windows or sliding glass doors transforms dark interiors. Position windows to frame views and cross-ventilate. South-facing glazing captures passive solar heat in winter but requires shading or low-E coatings to prevent overheating in summer.
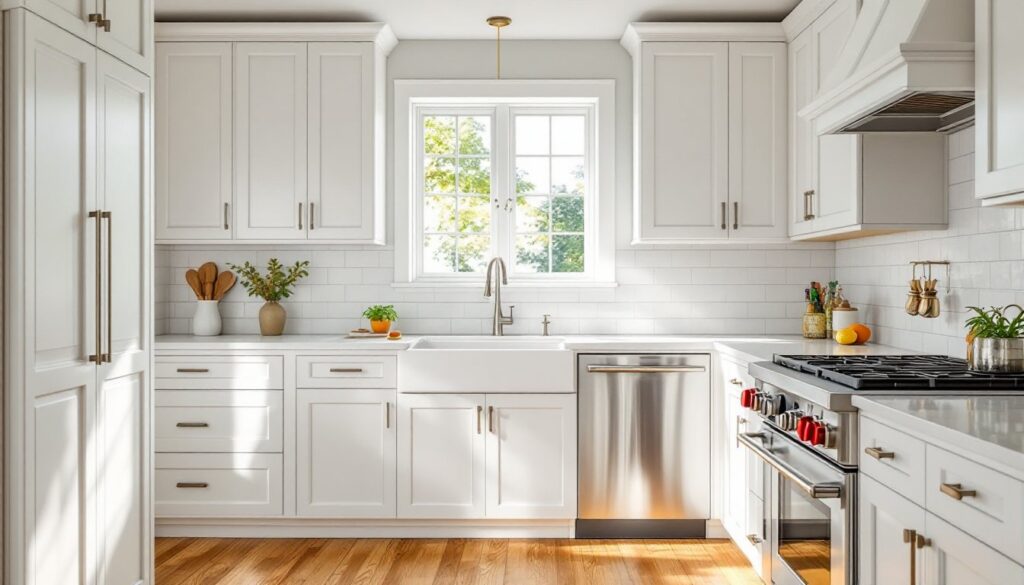
Kitchens benefit from the open floor plan. Install a large island with seating, as there’s usually no shortage of floor space. Use industrial-style appliances like a commercial-grade range or farmhouse sink to complement the barn aesthetic. Open shelving made from reclaimed barn boards ties the kitchen into the overall design, as discussed in many farmhouse decor guides.
Bathrooms require careful placement. Plumbing runs are easier if bathrooms stack on multiple floors or cluster near exterior walls. Freestanding soaking tubs, subway tile, and vintage fixtures fit the aesthetic. If the barn lacks floor joists rated for a cast-iron tub (around 500 pounds filled), reinforce framing or opt for acrylic.
Budgeting and Cost Considerations for Barn Conversions
Barn conversions typically cost $100 to $200 per square foot, depending on the structure’s condition and finishes. A 1,200-square-foot conversion might run $120,000 to $240,000, though costs vary by region and material choices. Foundation and structural repairs can add $10,000 to $50,000 if significant work is needed.
Budget line items include:
- Structural reinforcement: $15,000–$40,000 for steel beams, sistered joists, foundation work
- Insulation and weatherproofing: $8,000–$20,000 for spray foam or batt insulation, housewrap, and new roofing
- Windows and doors: $5,000–$15,000 for code-compliant egress windows and exterior doors
- HVAC system: $8,000–$18,000 for a ducted heat pump or mini-split system
- Plumbing: $10,000–$25,000 for new supply lines, drains, fixtures, and water heater
- Electrical: $8,000–$15,000 to upgrade service, install panel, and wire per NEC standards
- Interior finishes: $20,000–$60,000 for drywall, flooring, cabinetry, and trim
DIYers can reduce costs by handling demolition, insulation installation, and finish carpentry. But, hire licensed professionals for structural, electrical, and plumbing work, both for safety and to pass inspections. Permitting fees range from $1,000 to $5,000 depending on jurisdiction and project scope.
Unexpected costs crop up often. Hidden rot, outdated wiring, or contaminated soil around old livestock areas can blow budgets. Set aside a 15–20% contingency for surprises. If financing the project, construction loans for conversions may have higher interest rates than traditional mortgages since lenders view them as higher risk.
Key Challenges and How to Overcome Them
Foundation issues are common in older barns. Many sit on stone piers or shallow footings unsuitable for residential use. Underpinning with poured concrete footings or helical piers stabilizes the structure. This is not a DIY job, hire a foundation specialist and expect $10,000 to $30,000 for extensive repairs.
Moisture and pest damage often hide in sills, floor joists, and wall plates. Inspect carefully for powder post beetles, termites, and carpenter ants. Replace compromised lumber with pressure-treated material rated for ground contact (rated .40 or .60). Address drainage around the building with grading, gutters, and downspouts to prevent future moisture intrusion.
Insulation and air sealing are critical but tricky. Barns weren’t built with thermal envelopes in mind, so achieving modern energy standards requires spray foam or dense-pack cellulose. Don’t skip the vapor barrier, improper installation traps moisture and leads to mold. Many renovation tutorials stress the importance of proper insulation sequencing.
Electrical and plumbing integration means threading new systems through existing framing. Barns lack the stud bays and joist cavities found in conventional builds. Surface-mounted conduit is acceptable in some areas but may not fit the aesthetic. Plan utility runs early and frame chases where needed.
Heating and cooling large, open volumes efficiently is challenging. Mini-split heat pumps with multiple zones work well, as they don’t require ductwork. If installing forced air, size the system for the barn’s actual heating and cooling loads, not just square footage, high ceilings and large windows increase demand.
Energy Efficiency Upgrades for Converted Barns
Air sealing comes first. Use spray foam at rim joists, sill plates, and around window and door rough openings. Seal any penetrations for utilities with caulk or expanding foam. An uninsulated barn loses heat rapidly, so achieving a tight envelope is non-negotiable before adding insulation.
Insulation upgrades should meet or exceed local code minimums. Closed-cell spray foam provides both insulation and air sealing, with an R-value of roughly R-6 per inch. For walls, aim for R-20 to R-25: for ceilings, R-38 to R-49. If spray foam is cost-prohibitive, use batt insulation with careful air sealing, though it’s harder to install perfectly in irregular framing.
Energy-efficient windows reduce heat loss and gain. Triple-pane units with low-E coatings perform best in cold climates, while double-pane with low-SHGC (solar heat gain coefficient) glazing works for warmer regions. Proper flashing and sealing around rough openings prevents air leaks, a common failure point discussed in regional home design articles.
HVAC options vary by climate. Mini-split heat pumps (ductless) are popular for barn conversions due to their efficiency and flexibility. They provide both heating and cooling without the need for ductwork, which is difficult to retrofit. For colder zones, pair a heat pump with a backup propane or electric resistance heater.
LED lighting and Energy Star appliances round out efficiency upgrades. Barns often lack natural light, so plan for ample task and ambient lighting. Use dimmers to control light levels and reduce energy consumption. A heat pump water heater can cut water heating costs by 50% compared to standard electric models, though it requires adequate space and ambient warmth to operate efficiently.