Table of Contents
ToggleRunning wires for a home theater isn’t rocket science, but it does require planning and a steady hand. Done right, cables disappear into walls and ceilings, delivering crisp audio and video without the tangle of cords snaking across the floor. Done wrong, you’re left with buzzing speakers, dropped signals, and wires that won’t reach. Most homeowners can handle this project with basic tools and a weekend’s work, no need to hire out unless you’re punching through load-bearing walls or running conduit through concrete. This guide walks through everything from picking the right cables to fishing them through finished walls without tearing your house apart.
Key Takeaways
- Home theater wiring requires planning and correct cable ratings—use CL2/CL3-rated HDMI and speaker wire for in-wall installation to meet code and prevent fire hazards.
- Measure cable runs generously (add 20% extra length) and map your home theater layout before cutting holes to avoid multiple patches and wasted materials.
- Keep low-voltage cables at least 6 inches away from AC electrical lines and cross perpendicular (not parallel) to prevent electromagnetic interference and hum.
- Label every cable at both ends before fishing through walls, and always leave 8–12 inches of slack at connections for future adjustments and troubleshooting.
- Test each component individually after installation using your receiver’s test tones and signal verification to catch wiring problems before permanently mounting equipment.
- Avoid common mistakes like reversing speaker polarity, over-tightening connectors, and skipping cable lubricant on long or difficult runs.
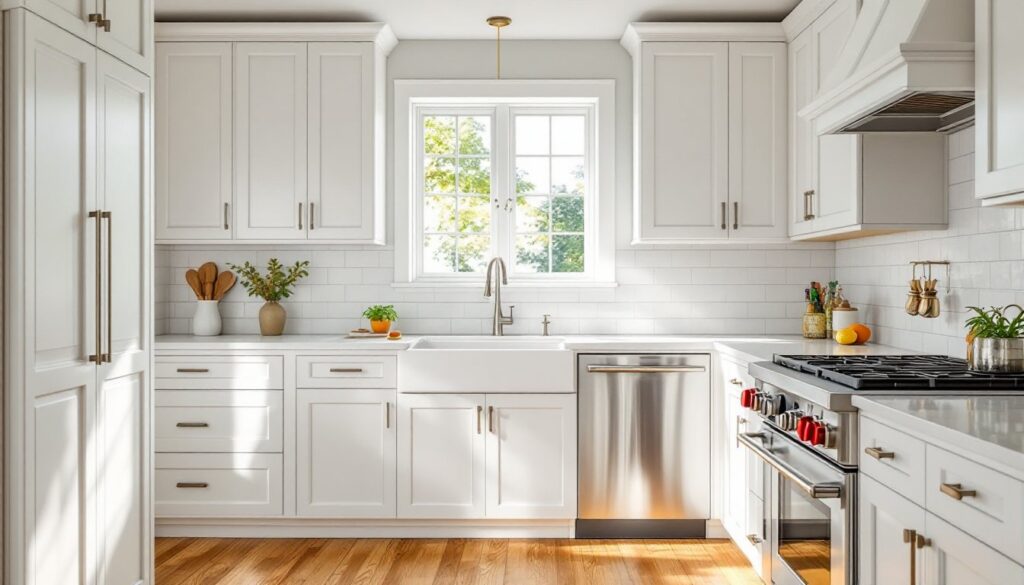
Understanding Your Home Theater Wiring Needs
Start by mapping what you’re connecting. A basic setup typically includes a display (TV or projector), a receiver or soundbar, and speakers. More complex systems add subwoofers, surround speakers, gaming consoles, streaming devices, and Blu-ray players.
HDMI cables carry both audio and video between components. Most modern setups rely on HDMI 2.1 for 4K or 8K signals, with older HDMI 2.0 still fine for standard 1080p or 4K at 60Hz. Count each device that needs to connect to the receiver or display, typically 3-6 HDMI runs.
Speaker wire runs from the receiver to each speaker location. A 5.1 surround system needs six runs (left, center, right, two surrounds, and subwoofer). A 7.1 or Atmos setup adds ceiling or rear speakers, sometimes requiring 9-12 runs total.
Power is separate. Most components need standard 120V outlets, but placing them strategically avoids visible extension cords. If adding new outlets, you’ll need an electrical permit in most jurisdictions and work must meet NEC code, consider hiring a licensed electrician unless you’re comfortable pulling permits and working in breaker panels.
Measure twice. Walk the route from each component location to where cables terminate. Add 20% extra length for routing around obstacles, drops through walls, and connection slack. A 15-foot straight-line run often needs 18-20 feet of actual cable.
Essential Cables and Components You’ll Need
Not all cables are equal, and in-wall wiring has specific requirements.
HDMI cables for in-wall use must be CL2 or CL3 rated (fire-safe jacket). Standard HDMI cables aren’t code-compliant inside walls. For runs over 25 feet, consider active HDMI or fiber optic HDMI cables to prevent signal degradation. Budget $15-40 per CL-rated cable depending on length.
Speaker wire should be 14-gauge or 16-gauge copper for most home setups. Use 14-gauge for runs over 50 feet or 4-ohm speakers to minimize resistance. CL2 or CL3 rating is required for in-wall installation. Oxygen-free copper (OFC) resists corrosion but costs more, worth it if you’re opening walls anyway. Expect $0.30-0.60 per foot for quality in-wall speaker wire.
Subwoofer cable (RCA or dedicated sub cable) carries low-frequency signals. If running in-wall, use CL2-rated shielded cable to reduce interference. Many installers skip in-wall sub cables and use wireless sub kits instead, cleaner and code-compliant without fishing heavy coax.
Wall plates and brushes give a finished look. Low-voltage mounting brackets (single-gang size) install in drywall and accept modular wall plates. Brush-style plates let you route multiple cables through one opening without pre-terminated ends.
Tools you’ll need:
- Stud finder (magnetic or electronic)
- Flex drill bit (54-inch) or fish tape for running cables
- Drywall saw or keyhole saw
- Voltage tester (if working near electrical)
- Cable pulling lubricant for long runs
- Headlamp or work light
Optional but helpful: A borescope camera (under $30) helps locate obstacles inside walls before you start fishing wire.
Planning Your Wiring Layout and Cable Routes
Good planning prevents opening five extra holes in your drywall.
Start at the equipment rack or media console. Identify one central location where the receiver, streaming boxes, and other gear will sit. This becomes your home run point, all cables either start or end here.
Sketch a simple floor plan. Mark speaker locations, display position, and the equipment rack. Draw the cable paths, staying as vertical or horizontal as possible to follow stud and joist bays. Diagonal runs waste cable and complicate fishing.
Avoid electrical lines. Keep low-voltage cables at least 6 inches from AC power lines to prevent electromagnetic interference (EMI). If cables must cross electrical, do it at 90-degree angles, not parallel runs. Use a stud finder with AC detection or a non-contact voltage tester to locate live wires before drilling.
Identify your access points. Attics and crawl spaces make running cables infinitely easier. Finished basements with drop ceilings are a gift. If you’re working with finished walls and ceilings on all sides, expect slower progress and more patching.
For in-wall routes, cables typically run vertically inside stud bays (16 inches on center, sometimes 24 inches). Horizontal runs go through top or bottom plates or along joists in the attic or basement. Avoid running cables through fire blocks, horizontal 2x4s halfway up some walls that block fish tape. You may need to drill through these.
Mark all hole locations with painter’s tape before cutting. Measure from a corner or fixed reference point, not from furniture or guesswork. Many structured wiring techniques emphasize using consistent reference points to avoid misaligned holes.
Label everything. Use tape flags or a label maker to tag each cable at both ends before fishing it through walls. “Front Left Speaker,” “HDMI-PS5,” and “Sub” save you hours of tracing later.
Step-by-Step Installation Process
With planning done, installation follows a logical sequence.
1. Cut access holes. Use a drywall saw or oscillating multitool to cut openings for wall plates or speaker mounts. Single-gang low-voltage boxes are 2 inches x 3.5 inches. Cut carefully, patching sloppy holes shows.
2. Install low-voltage brackets. These plastic boxes mount in drywall with screw tabs or flip-out ears. They keep cables organized and give wall plates something solid to attach to. Not always required, but they prevent cables from slipping back into the wall.
3. Drill through plates. If running vertically, drill through the top or bottom plate of the wall (the horizontal 2×4 at the top/bottom of studs). Use a flex bit or standard spade bit. Drill at a slight angle from the attic or basement to enter the stud bay cleanly. Wear safety goggles, drilling overhead sends dust and splinters straight into your face.
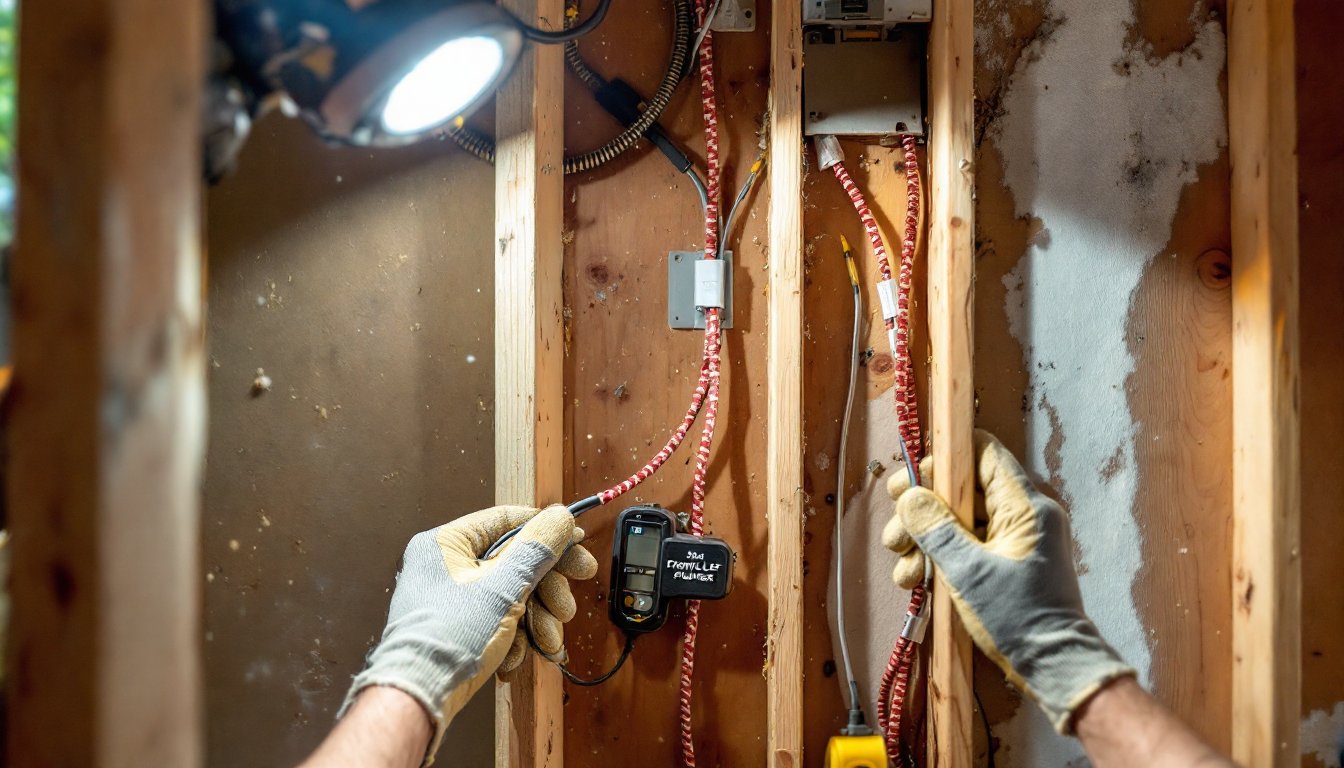
4. Fish the cables. Feed fish tape or a glow rod down from the attic (or up from the basement) into the stud bay. Attach cables with electrical tape, wrapping tightly so they don’t snag. Pull slowly and steadily. If the cable binds, don’t force it, back up and try a different angle. For long or tough runs, a second person feeding cable from the other end prevents kinks.
5. Secure cables. Use cable staples rated for low-voltage in exposed areas like attics or basements. Don’t crush the cable, staples should hold snugly without compressing the jacket. Avoid running cables across the tops of joists in attics where they could be stepped on: staple them to joist sides instead.
6. Terminate connections. At wall plates, leave 8-12 inches of slack coiled behind the plate. Strip speaker wire carefully (1/4 to 1/2 inch) and connect to binding posts or banana plugs. HDMI and other pre-terminated cables just route through brush plates or keystone jacks.
Running Cables Through Walls and Ceilings
Fishing cables through closed walls is the hardest part.
Top-down method (from attic): Cut the wall plate hole, drill through the top plate from the attic, drop a weighted string or chain down the bay, retrieve it through the hole, tie on cables, and pull back up. This works well for exterior walls if you can access the attic space.
Bottom-up method (from basement or crawl space): Drill up through the bottom plate, feed fish tape upward, hook it at the wall plate opening, attach cables, and pull down. Easier on interior walls with basement access.
Behind baseboards: For ground-level runs (like front left/right speakers), sometimes pulling baseboards and running wire in the gap between drywall and flooring avoids opening walls entirely. Reinstall baseboards over the wire. Not code-compliant in all areas for in-wall rated cable, but common for retrofit work.
Ceiling speakers or Atmos channels: Drill from the attic directly above the speaker cutout. Drop cables straight down. If you don’t have attic access, you’ll need to cut an access panel in the ceiling, this is messy and may require a drywall patch and paint.
Use cable pulling lubricant (gel or powder) on long runs or sharp bends. It reduces friction and prevents jacket damage. Professionals performing home theater installations often rely on lubricant for runs over 40 feet or through multiple bends.
Always pull cable with a helper if possible. One person feeds, the other pulls. Communication prevents cable jams and torn jackets.
Common Wiring Mistakes to Avoid
Most DIY wiring problems come from a handful of repeated errors.
Using non-rated cable in walls. Standard HDMI or speaker wire without CL2/CL3 rating is a code violation and a fire hazard. Inspectors will call it out, and it’s a pain to re-pull later. Spend the extra few bucks per cable.
Mixing up polarity on speakers. Speaker wire has two conductors, often marked with a stripe or different color. Connect positive to positive, negative to negative, on both the receiver and speaker ends. Reversing polarity on one speaker causes phase cancellation, sound gets thin and weird, especially bass.
Over-tightening connectors. Banana plugs, binding posts, and HDMI screws don’t need gorilla strength. Hand-tight is enough. Over-torquing cracks connectors and damages cable conductors.
Crossing or bundling with AC power. Running speaker wire parallel to electrical wiring for more than a foot or two invites hum and interference. If you must cross, do it perpendicular.
Forgetting slack. Leave extra cable at both ends. You’ll need it for future adjustments, equipment swaps, or repairs. Pulling cable taut looks neat but makes everything harder down the road.
Skipping labels. Twenty identical white cables disappearing into a wall all look the same six months later. Label everything with tape, tags, or a marker.
Not checking for obstacles before drilling. Ducts, plumbing, electrical, and fire blocks live inside walls. A $30 inspection camera or careful probing with a wire coat hanger can save you from drilling into a water line.
Testing and Troubleshooting Your Setup
Once cables are in, verify everything works before closing walls or mounting equipment permanently.
Test HDMI connections one at a time. Plug in each source device, power it on, and confirm picture and sound. If a signal drops or flickers, try a different HDMI input on the receiver or display, bad ports happen. Swap cables to rule out a defective cable. For long runs, signal degradation sometimes shows as sparkles, dropouts, or no picture. An HDMI signal tester (under $20) identifies weak signals.
Test each speaker individually. Use the receiver’s test tone function to cycle through channels. Each speaker should produce a clear tone at the same volume. If one is silent, check connections at both ends, confirm polarity, and verify the receiver output isn’t muted or disabled. If the tone is faint or distorted, check for loose wire strands shorting positive to negative.
Check for hum or buzz. With the system on but no content playing, listen for noise. A low hum often means a ground loop (multiple devices grounded through different outlets). Try plugging everything into the same power strip or use a ground loop isolator (around $15). High-pitched buzzing can indicate interference from nearby AC lines, re-route low-voltage cables if needed.
Use a multimeter to check speaker wire continuity if a channel is dead. Set to resistance (ohms), touch probes to both ends of the same conductor. You should see low resistance (under 1 ohm for short runs). Infinite resistance means a break somewhere in the cable.
Run calibration. Most receivers include auto-calibration with a microphone (Audyssey, YPAO, Dirac, etc.). Follow the on-screen prompts. This adjusts levels, distances, and crossovers for your room. It won’t fix bad wiring, but it optimizes what you’ve installed.
If you followed step-by-step wiring guides and double-checked connections, most issues trace back to a loose wire, reversed polarity, or a bad cable. Methodical testing narrows it down fast.
Once everything tests clean, button up wall plates, mount speakers, and enjoy. A well-wired home theater delivers years of clean sound and video without the clutter, and you’ll know exactly where every cable runs if you ever need to troubleshoot or upgrade.