Table of Contents
ToggleThe farm style bathroom vanity has become one of the most requested features in bathroom renovations over the past few years, and it’s not slowing down in 2026. This isn’t just about shiplap and mason jars, it’s about bringing solid craftsmanship, clean lines, and functional storage into a space that often gets overlooked. Whether someone’s gutting a 1970s powder room or updating a builder-grade master bath, a farmhouse vanity adds character without sacrificing practicality. This guide walks through what defines farm style, which materials hold up best, and how to choose between building one or buying ready-made.
Key Takeaways
- A farm style bathroom vanity combines solid wood construction, clean lines, and visible hardware in whites, grays, and natural tones to bring character and functionality to any bathroom renovation.
- Choose farmhouse vanities at least 36 inches wide for single sinks and 60+ inches for double configurations, with 22-24 inches depth to accommodate chunky hardware and thicker countertops that define the aesthetic.
- Solid wood like oak or pine is ideal for authentic construction, while quality plywood with hardwood veneer and water-resistant finishes offer budget-friendly alternatives that withstand bathroom humidity.
- Pre-made farm style bathroom vanities start around $400 for 36-inch units, while DIY builds typically cost $300-$600 in materials and offer complete customization for intermediate carpentry skills.
- Layer mixed materials—such as painted cabinets with natural wood tops or wood frames with concrete countertops—and add open shelving, legs, and aged hardware to achieve the grounded, handmade look farmhouse design demands.
- Install your farmhouse vanity with proper anchoring to wall studs, careful plumbing alignment using flexible supply lines, and waterproof finishing touches like silicone caulk to ensure durability and prevent water damage.
What Makes a Bathroom Vanity “Farm Style”?
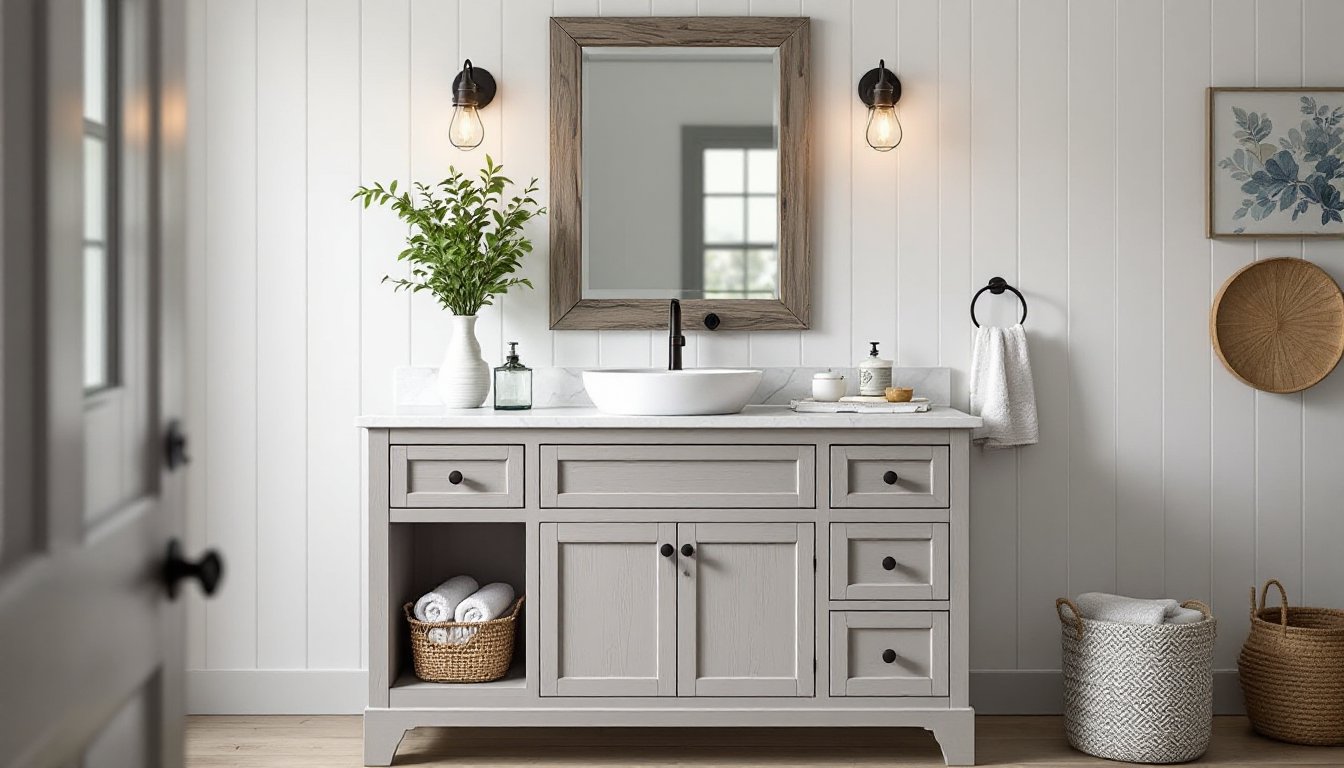
Farm style, often called farmhouse or modern farmhouse, draws from rural American and European country design. The hallmarks are simple: unpretentious materials, visible joinery or hardware, and a focus on utility over ornament.
Key characteristics include solid wood construction (or convincing wood-look finishes), open or glass-front cabinetry, and apron-front or vessel sinks. Paint colors lean toward whites, grays, soft blues, and natural wood tones. Hardware tends to be oil-rubbed bronze, matte black, or brushed nickel, nothing too shiny or contemporary.
Unlike traditional vanities with ornate molding or modern floating units with slab doors, farmhouse vanities sit somewhere in between. They often include elements like X-bracing on cabinet doors, shaker-style panels, or plank detailing. The overall effect should feel grounded and handmade, even if it came flat-packed.
Another defining trait is the countertop choice: marble, butcher block, or concrete are common, while laminate and cultured marble tend to break the aesthetic. The goal is to look like the vanity could have been built in a barn workshop, then cleaned up for indoor use.
Top Design Features of Farmhouse Bathroom Vanities
Farmhouse vanities share a few recurring design moves that set them apart from standard cabinetry.
Open shelving is a big one. Instead of closing everything behind doors, many farm style units include at least one open bay for baskets, rolled towels, or decorative storage. This keeps everyday items accessible and adds visual texture.
Legs or feet are another signature. Rather than a toe-kick base, farmhouse vanities often sit on turned legs, tapered feet, or simple block supports. This gives the piece a furniture-like quality and makes cleaning the floor underneath easier.
Dual-sink configurations work especially well in farmhouse designs. A long, trough-style vanity with two vessel sinks and a shared mirror feels both practical and social, like an old washstand scaled up.
Hardware matters more than people think. Bin pulls, cup pulls, and oversized knobs in aged finishes help sell the look. Avoid anything too sleek or minimal: the style leans tactile and sturdy.
Finally, many designs incorporate mixed materials: a painted cabinet base with a natural wood top, or a wood frame with a concrete countertop. This layering adds depth and keeps the look from feeling too matchy.
Choosing the Right Size and Configuration
Vanity sizing follows standard plumbing rough-in dimensions, but farmhouse styles tend to run larger and deeper than contemporary units.
Single-sink vanities typically range from 30 to 48 inches wide. For a farmhouse look, 36 inches or wider works better, anything smaller can feel cramped once you add chunky hardware and a vessel sink.
Double-sink units start around 60 inches and often stretch to 72 or 84 inches. Make sure there’s at least 30 inches of counter space per sink for elbow room, per IRC guidelines (though codes vary by jurisdiction).
Depth is another consideration. Standard vanities are 21 inches deep, but farmhouse designs often push to 22 or 24 inches to accommodate deeper sinks or thicker countertops. Measure the bathroom carefully, an extra few inches can block a door swing or crowd a toilet.
For tight spaces, consider a wall-mounted or console-style farmhouse vanity. These use metal brackets or legs instead of a full cabinet, keeping the footprint small while maintaining the aesthetic.
Always check the plumbing rough-in before committing to a size. The drain should be centered in the cabinet, and supply lines need clearance around drawers or shelves. If the existing rough-in doesn’t match the new vanity, relocating plumbing adds cost and may require a permit.
Best Materials for Authentic Farm Style Vanities
Material choice makes or breaks the farmhouse aesthetic, and determines how well the vanity holds up in a humid bathroom.
Solid wood is the gold standard. White oak, pine, maple, and reclaimed barn wood are all period-appropriate. Pine is affordable and easy to work with, but it dents easily. Oak is harder and more durable, especially for high-traffic bathrooms. Reclaimed wood adds instant character but often requires extra prep to remove nails, sand rough edges, and seal against moisture.
If building or buying on a budget, plywood with a hardwood veneer is a solid middle ground. Use cabinet-grade plywood (¾-inch thickness) for the carcass and face frames. Avoid particleboard or MDF in bathrooms, they swell and degrade when exposed to water, even with a good finish.
For painted finishes, poplar is a cost-effective choice. It takes paint well and resists warping better than pine. Just make sure to prime all sides before assembly to prevent moisture absorption.
Countertop materials should complement the base. Butcher block (typically maple or walnut) adds warmth and pairs well with white or gray cabinetry, but it requires regular oiling and isn’t ideal near sinks unless sealed with a waterproof finish like Waterlox. Marble or quartz in honed (matte) finishes lean more modern farmhouse, while concrete or soapstone fit a more industrial-rustic vibe.
Hardware and sinks also fall under material decisions. Cast iron or fireclay farmhouse sinks are heavy (60+ pounds for a 30-inch apron front) and require reinforced cabinetry. Porcelain vessel sinks are lighter and easier to install, though they sit higher, plan countertop height accordingly (usually 30 to 32 inches total with a vessel sink).
Finally, use a water-resistant finish. For natural wood, a penetrating oil or polyurethane with at least three coats protects against splashes. For painted pieces, a semi-gloss or satin latex is easier to wipe down than flat paint.
DIY vs. Pre-Made: Which Farm Style Vanity Is Right for You?
Deciding between building a vanity and buying one depends on skill level, budget, and how custom the design needs to be.
Pre-made vanities are faster and often cheaper upfront. Big-box stores and online retailers offer farmhouse-style units starting around $400 for a 36-inch single sink, climbing to $1,200+ for larger or higher-quality builds. These usually come with pre-drilled holes for faucets and drains, saving layout headaches. The downside: they’re sized in standard increments (30, 36, 48, 60 inches), so odd-width bathrooms may leave gaps or require filler strips.
Quality varies widely. Check for dovetail or dowel joinery in drawers, soft-close hinges, and solid wood or plywood construction. Avoid units with stapled corners or thin laminate, they won’t hold up.
DIY builds offer full control over size, materials, and detailing. A basic farmhouse vanity can be built with intermediate carpentry skills: a face-frame cabinet, shaker-style doors, and either a purchased countertop or a DIY butcher block or concrete pour. Material costs for a 48-inch unit typically run $300 to $600, depending on wood species and countertop choice.
Required tools include a table saw or circular saw with a guide, drill/driver, pocket hole jig (for face frames), and a miter saw for trim and door rails. If building doors from scratch, a router with a roundover or ogee bit cleans up edges nicely.
The biggest DIY challenge is integrating plumbing. The cabinet needs access holes for supply lines and a drain, plus enough clearance for P-traps and shutoff valves. Measure twice, cut once, fixing a misplaced hole in a finished cabinet is painful.
If carpentry isn’t a strong suit but customization matters, consider a hybrid approach: buy a simple cabinet base or repurpose an old dresser, then add a custom countertop and farmhouse sink. This gives a one-of-a-kind look without requiring advanced joinery skills.
One more consideration: if the vanity will be wall-mounted or needs to support a heavy stone countertop, make sure it’s anchored into studs with appropriate fasteners. A typical drywall anchor won’t cut it, use 3-inch cabinet screws into studs or toggle bolts rated for the load.
How to Style Your Farm Bathroom Vanity With Fixtures and Decor
Getting the fixtures and finishing touches right can make or break the farmhouse aesthetic.
Start with the faucet. Bridge-style or single-handle faucets in oil-rubbed bronze, matte black, or brushed nickel fit best. Avoid chrome or polished finishes, they read too contemporary. If using a vessel sink, choose a tall spout with enough clearance: for undermount or drop-in sinks, a standard 4-inch or 8-inch spread works fine.
Lighting plays a major role. Farmhouse bathrooms often feature industrial-style sconces, cage lights, or vintage schoolhouse pendants. Mount sconces at eye level (roughly 66 to 70 inches from the floor) on either side of the mirror for even, shadow-free light. Avoid builder-grade vanity bars unless they have a distressed or aged finish.
Mirror choice matters. Wood-framed mirrors, especially in reclaimed or weathered finishes, reinforce the rustic vibe. For a modern farmhouse twist, try a round or arched mirror with a metal frame. Lean a large mirror against the wall instead of hanging it for a more casual, lived-in look.
Hardware and accessories should feel curated, not cluttered. Swap out plastic soap dispensers for glass or ceramic versions. Use woven baskets or galvanized metal bins for open-shelf storage. A small wooden tray corrals everyday items like toothbrush holders and hand soap.
Textiles add warmth: linen hand towels, a jute rug, or a vintage-style bath mat in muted tones. Inspiration for modern farmhouse fixtures often highlights how cohesive material palettes unify a space.
Greenery softens hard surfaces. A small potted plant, like a succulent or eucalyptus stem, adds life without requiring much upkeep.
Finally, resist the urge to over-accessorize. The best farmhouse bathrooms feel clean and functional, not like a countryliving.com photo shoot exploded. Choose a few quality pieces and let the vanity itself be the focal point.
Installation Tips for Your Farmhouse Vanity
Installing a farmhouse vanity follows the same general steps as any vanity, but a few details deserve extra attention.
Prep the space first. Shut off water at the angle stops (the small valves under the sink) or at the main if those aren’t present. Remove the old vanity, then check the floor and walls for damage. If the subfloor is soft or the drywall is water-stained, repair it before setting the new unit.
Check for level. Bathrooms are rarely perfectly flat. Use a 4-foot level on the floor where the vanity will sit. If it’s off by more than ⅛ inch, shim the low side with plastic shims (wood shims can compress over time). A level vanity prevents doors from swinging open and helps the countertop sit flush.
Anchor to studs. Locate studs with a stud finder or by tapping the wall. Farmhouse vanities, especially those with stone countertops, can weigh several hundred pounds. Use 3-inch cabinet screws through the back rail or cleats into at least two studs. If studs don’t align, install a backing board between studs before setting the vanity.
Plumbing connections are straightforward but require care. If the new vanity is deeper or the sink offset is different, the existing supply lines and drain may not align. Flexible braided supply lines make it easier to reach the shutoff valves. For the drain, a P-trap extension or offset adapter may be needed. Tighten all connections hand-tight plus a quarter turn with pliers, overtightening can crack plastic fittings.
If installing an apron-front or vessel sink, double-check the cutout dimensions before cutting into a new countertop. Most sinks come with a template: tape it down, trace the outline, then cut with a jigsaw fitted with a fine-tooth blade. For butcher block or solid wood countertops, seal all cut edges before installing the sink to prevent water infiltration.
Seal the countertop to the wall with a bead of clear or color-matched silicone caulk. This prevents water from running down the back and into the cabinet. Don’t use latex caulk, it’s less flexible and breaks down faster in damp conditions.
Finally, run water and check for leaks before calling the job done. Let the faucet run for a few minutes, then inspect all connections with a flashlight. If everything’s dry, clean up and reinstall the P-trap cleanout plug.
Safety note: If moving or rerouting plumbing, check local codes. Some jurisdictions require a licensed plumber for supply line or drain alterations. When in doubt, pull a permit, it’s cheaper than fixing unpermitted work later.