Table of Contents
ToggleAdding ceiling speakers to a home theater transforms the listening experience, pulling viewers into the action with overhead effects and creating a true surround sound environment. Unlike traditional floor-standing or bookshelf speakers, ceiling-mounted units disappear into the room while delivering the height channels essential for modern Dolby Atmos and DTS:X soundtracks. Whether someone is upgrading an existing theater or starting from scratch, ceiling speakers offer flexibility, clean aesthetics, and immersive audio without taking up floor space. This guide walks through the key decisions, from choosing the right speaker type to placement strategy and installation tips for a DIY project.
Key Takeaways
- Home theater ceiling speakers enable immersive Dolby Atmos and DTS:X surround sound by adding height channels that place overhead effects exactly where they occur in real life.
- In-ceiling speakers offer the cleanest aesthetic and best performance when attic access is available, while on-ceiling models provide flexibility for concrete or finished ceilings where cutting isn’t possible.
- Proper speaker placement slightly in front of and behind the listening area creates a dome of sound rather than localizing effects directly overhead, with receivers needing enough amplified channels to support your planned configuration.
- DIY installation of home theater ceiling speakers is achievable with the right tools and planning, requiring careful joist mapping, proper wire routing, and secure mounting to avoid common mistakes like overtightening clamps.
- Select ceiling speakers with 8-inch woofers for typical rooms, sensitivity of 89 dB or higher, frequency response down to 50 Hz, and moisture-resistant materials if near bathrooms or in humid basements.
- Budget for accessories like CL2/CL3-rated speaker wire, wall plates, and tools ($50–$100), and consider running extra wire to future speaker locations during initial installation for easier upgrades later.
Why Choose Ceiling Speakers for Your Home Theater?
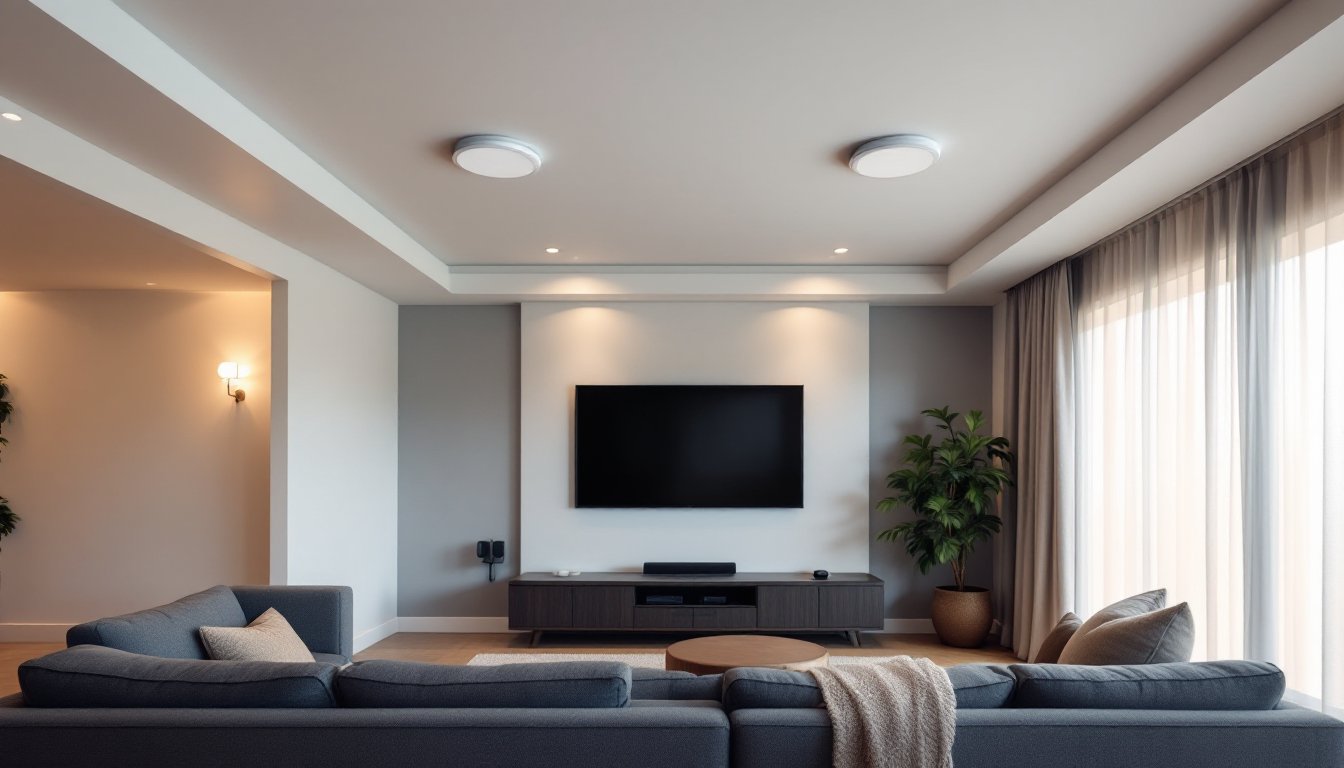
Ceiling speakers deliver overhead sound that’s impossible to achieve with traditional speaker setups. They’re the backbone of Dolby Atmos and DTS:X formats, which add a vertical dimension to surround sound by placing effects above the listener. Instead of hearing a helicopter only from the left or right, users hear it moving overhead, exactly where it would be in real life.
Beyond immersion, ceiling speakers free up floor space and eliminate the clutter of speaker stands or towers. In multipurpose rooms, where a theater doubles as a family room, they blend into the ceiling and don’t compete with furniture or traffic flow. Properly installed in-ceiling speakers also minimize sound reflections off walls and furniture, giving cleaner, more controlled audio compared to upward-firing modules that bounce sound off the ceiling.
For homeowners planning a dedicated theater, ceiling speakers are often non-negotiable. For casual upgrades, they’re a practical middle ground: better than a soundbar, less invasive than a full tower setup, and compatible with most AV receivers that support height channels.
Types of Home Theater Ceiling Speakers Explained
Not all ceiling speakers are built the same. The two main categories, in-ceiling and on-ceiling, serve different installation scenarios and performance needs.
In-Ceiling vs. On-Ceiling Speakers
In-ceiling speakers mount flush with the ceiling surface, cutting a round or square hole for the driver and enclosure. They offer the cleanest look and work best when there’s accessible attic or crawl space above. Most models use a spring-loaded dog-ear clamp system: the installer cuts a hole (typically 6.5 inches or 8 inches in diameter), runs speaker wire, and secures the unit by tightening screws that pull the clamps tight against the drywall. Paintable grilles let them disappear completely. In-ceiling designs are ideal for Atmos height channels, rear surrounds, or even full 5.1.2 or 7.1.4 configurations.
On-ceiling (surface-mount) speakers attach directly to the ceiling surface with brackets, similar to how a light fixture mounts. They’re the go-to when cutting into the ceiling isn’t possible, concrete ceilings, finished spaces with no attic access, or renters who can’t make permanent modifications. On-ceiling models are bulkier and more visible, but installation is faster and doesn’t require drywall patching. Some high-end units, like recent overhead speakers from Sonos, offer premium drivers and streamlined designs that minimize visual impact while delivering serious output.
Another consideration: dual-voice-coil speakers (often labeled as “aimable” or “pivoting tweeters”) allow the tweeter to be angled toward the listening position after installation, which helps fine-tune dispersion in rooms where the seating isn’t directly below the speaker.
How to Choose the Right Ceiling Speakers for Your Space
Start by matching speaker size and power handling to the room’s dimensions and the AV receiver’s output. For a typical 12×15-foot home theater, 8-inch woofers provide enough low-end extension for effects and dialogue without needing a subwoofer for every channel. Smaller 6.5-inch models work in bedrooms or secondary spaces but may lack impact in larger rooms.
Check the speaker’s frequency response and sensitivity rating. A sensitivity of 89 dB or higher means the speaker produces more volume per watt, which matters if the AV receiver puts out 50–75 watts per channel (common in mid-tier models). Frequency response should extend down to at least 50 Hz for in-ceiling speakers used as surrounds or height channels: subwoofers handle the deep bass below that.
Impedance is another spec to verify. Most home theater receivers expect 8-ohm speakers, though some models handle 6-ohm loads. Mixing impedances can cause the receiver to overheat or go into protection mode, so double-check compatibility before buying.
For rooms with high ceilings (10 feet or more), prioritize models with higher sensitivity and larger woofers to project sound down to ear level. In rooms with standard 8-foot ceilings, almost any quality in-ceiling speaker will perform well as long as placement is correct.
Finally, consider moisture resistance if the theater shares space with a bathroom or is in a basement prone to humidity. Look for speakers with polypropylene cones and butyl rubber surrounds, which resist warping better than paper cones and foam.
Installation Tips for DIY Home Theater Ceiling Speakers
Installing in-ceiling speakers is manageable for a confident DIYer, but it requires careful planning and the right tools. Here’s the process:
1. Locate Joists and Avoid Obstacles
Use a stud finder with AC wire detection to map ceiling joists and identify any electrical wiring or HVAC ducts. Speakers must fit between joists, most models need 8–10 inches of clearance. Mark the center point for each speaker location with painter’s tape.
2. Cut the Holes
Trace the speaker’s template (usually included) onto the ceiling. Use a drywall saw or hole saw sized to the speaker’s cutout diameter (commonly 6.5 or 8 inches). For cleaner cuts with less dust, score the drywall face with a utility knife first. Work slowly, drywall is easy to patch, but oversized holes look sloppy.
3. Run Speaker Wire
Use CL2 or CL3-rated speaker wire (16-gauge or 14-gauge for runs over 50 feet) and route it through the ceiling cavity. If there’s attic access, this is straightforward. For finished ceilings with no access, a flexible drill bit or fish tape helps snake wire between joists. Label each wire at both ends to avoid confusion during hookup.
4. Connect and Secure the Speakers
Strip 1/2 inch of insulation from each wire end and connect to the speaker terminals (observe polarity: positive to positive, negative to negative). Insert the speaker into the cutout, then tighten the mounting screws evenly. The dog-ear clamps will pull the speaker snug against the drywall. Don’t overtighten, cracked drywall is a common rookie mistake.
5. Test and Adjust
Before snapping on the grilles, run test tones or pink noise through each speaker to confirm polarity and output. If one speaker sounds hollow or out-of-phase, swap the positive and negative wires.
Safety Notes:
Always wear safety goggles when cutting drywall, dust and debris fall directly into your face. If working in an attic, watch for exposed nails, insulation, and low clearances. Turn off power to any circuits in the work area to avoid accidental contact with live wires.
Optimal Placement and Speaker Layout for Surround Sound
Speaker placement makes or breaks a home theater’s performance. For Dolby Atmos systems, the most common configurations are 5.1.2 (five ear-level speakers, one subwoofer, two height channels) or 7.1.4 (seven ear-level speakers, one sub, four height channels).
Height Channel Placement (Atmos):
Position ceiling speakers slightly in front of and slightly behind the main seating area, not directly overhead. Dolby recommends placing front height speakers 2–3 feet ahead of the listening position and rear heights 2–3 feet behind, angled toward the center. This creates a dome of sound rather than a flat overhead effect.
Surround Channels:
For 5.1 or 7.1 systems using ceiling speakers as surrounds, aim for 90–110 degrees off-axis from the main seating position (side surrounds) and 135–150 degrees for rear surrounds. This keeps the soundfield enveloping without localizing effects to a single speaker.
Avoid Common Mistakes:
- Don’t place speakers too close to walls (less than 2 feet), this causes bass buildup and muddy midrange.
- Avoid perfectly symmetrical layouts in asymmetrical rooms. Adjust placement to account for furniture, doorways, and reflective surfaces.
- In rooms with vaulted or angled ceilings, aim speakers down toward the listening area using aimable tweeters.
Many home automation systems now integrate room correction software (like Audyssey or Dirac Live) that compensates for placement compromises, but starting with proper positioning reduces how much digital correction is needed.
Top Considerations Before You Buy
Before ordering speakers, nail down these details:
Room Acoustics:
Hard surfaces (tile, hardwood, large windows) reflect sound and cause echo. Ceiling speakers alone won’t fix bad acoustics. Add area rugs, curtains, or acoustic panels to absorb excess reflections. Some homeowners draw inspiration from design shows to blend acoustic treatments into decor without sacrificing style.
AV Receiver Compatibility:
Confirm the receiver has enough amplified channels for the planned speaker count. A 7.2-channel receiver can drive a 5.1.2 Atmos setup, but a 7.1.4 system requires a 9.2 or 11.2 receiver, or an external amplifier.
Budget for Extras:
Beyond the speakers, budget for speaker wire, wall plates, a drywall saw, and possibly a fish tape or flexible drill bit. For a four-speaker install, expect $50–$100 in accessories and tools if starting from scratch.
DIY vs. Professional Install:
If the ceiling is concrete, has complex framing, or houses critical wiring or plumbing, hire a professional. Cutting into the wrong spot can mean expensive repairs. For standard drywall ceilings with attic access, this is a solid weekend DIY project for anyone comfortable with power tools and basic electrical work.
Building Codes and Permits:
Most jurisdictions don’t require permits for low-voltage speaker wire installation, but always verify local rules, especially if running wire through fire-rated walls or ceilings. Using CL2 or CL3-rated wire ensures compliance with the National Electrical Code (NEC) for in-wall and in-ceiling applications.
Future-Proofing:
Consider running extra wire to blank ceiling locations now, even if those speakers aren’t in the budget yet. Fishing wire later is harder than pulling an extra run during the initial install.